Introduction to Hachure Survey
One of the first things you can do is undertake a basic walk over survey where you map the area, noting key topogrpahic features (lumps and bumps usually), alongside more obvious elements like roads, buildings and waterways. Adding hachures to these maps helps visualise these features and can indicate areas of interest that might not be obvious when simply looking around.
Self‑Guided Activity: Introduction to Hachure Survey
Duration: 75–105 minutes
Location: Outdoor area with visible slopes or subtle earthworks (e.g. park, open field, historic site)
Learning Aims
By completing this activity independently, you will:
- Understand the purpose of hachure survey in archaeology
- Learn how slope and relief are represented through hachures
- Practise observational, recording, and mapping skills
- Develop attention to detail and organised field recording
Equipment
- Clipboard and pencils
- Graph paper or a simple printed base map
- Measuring tape
- Line level or basic levelling tool (if available)
- Compass
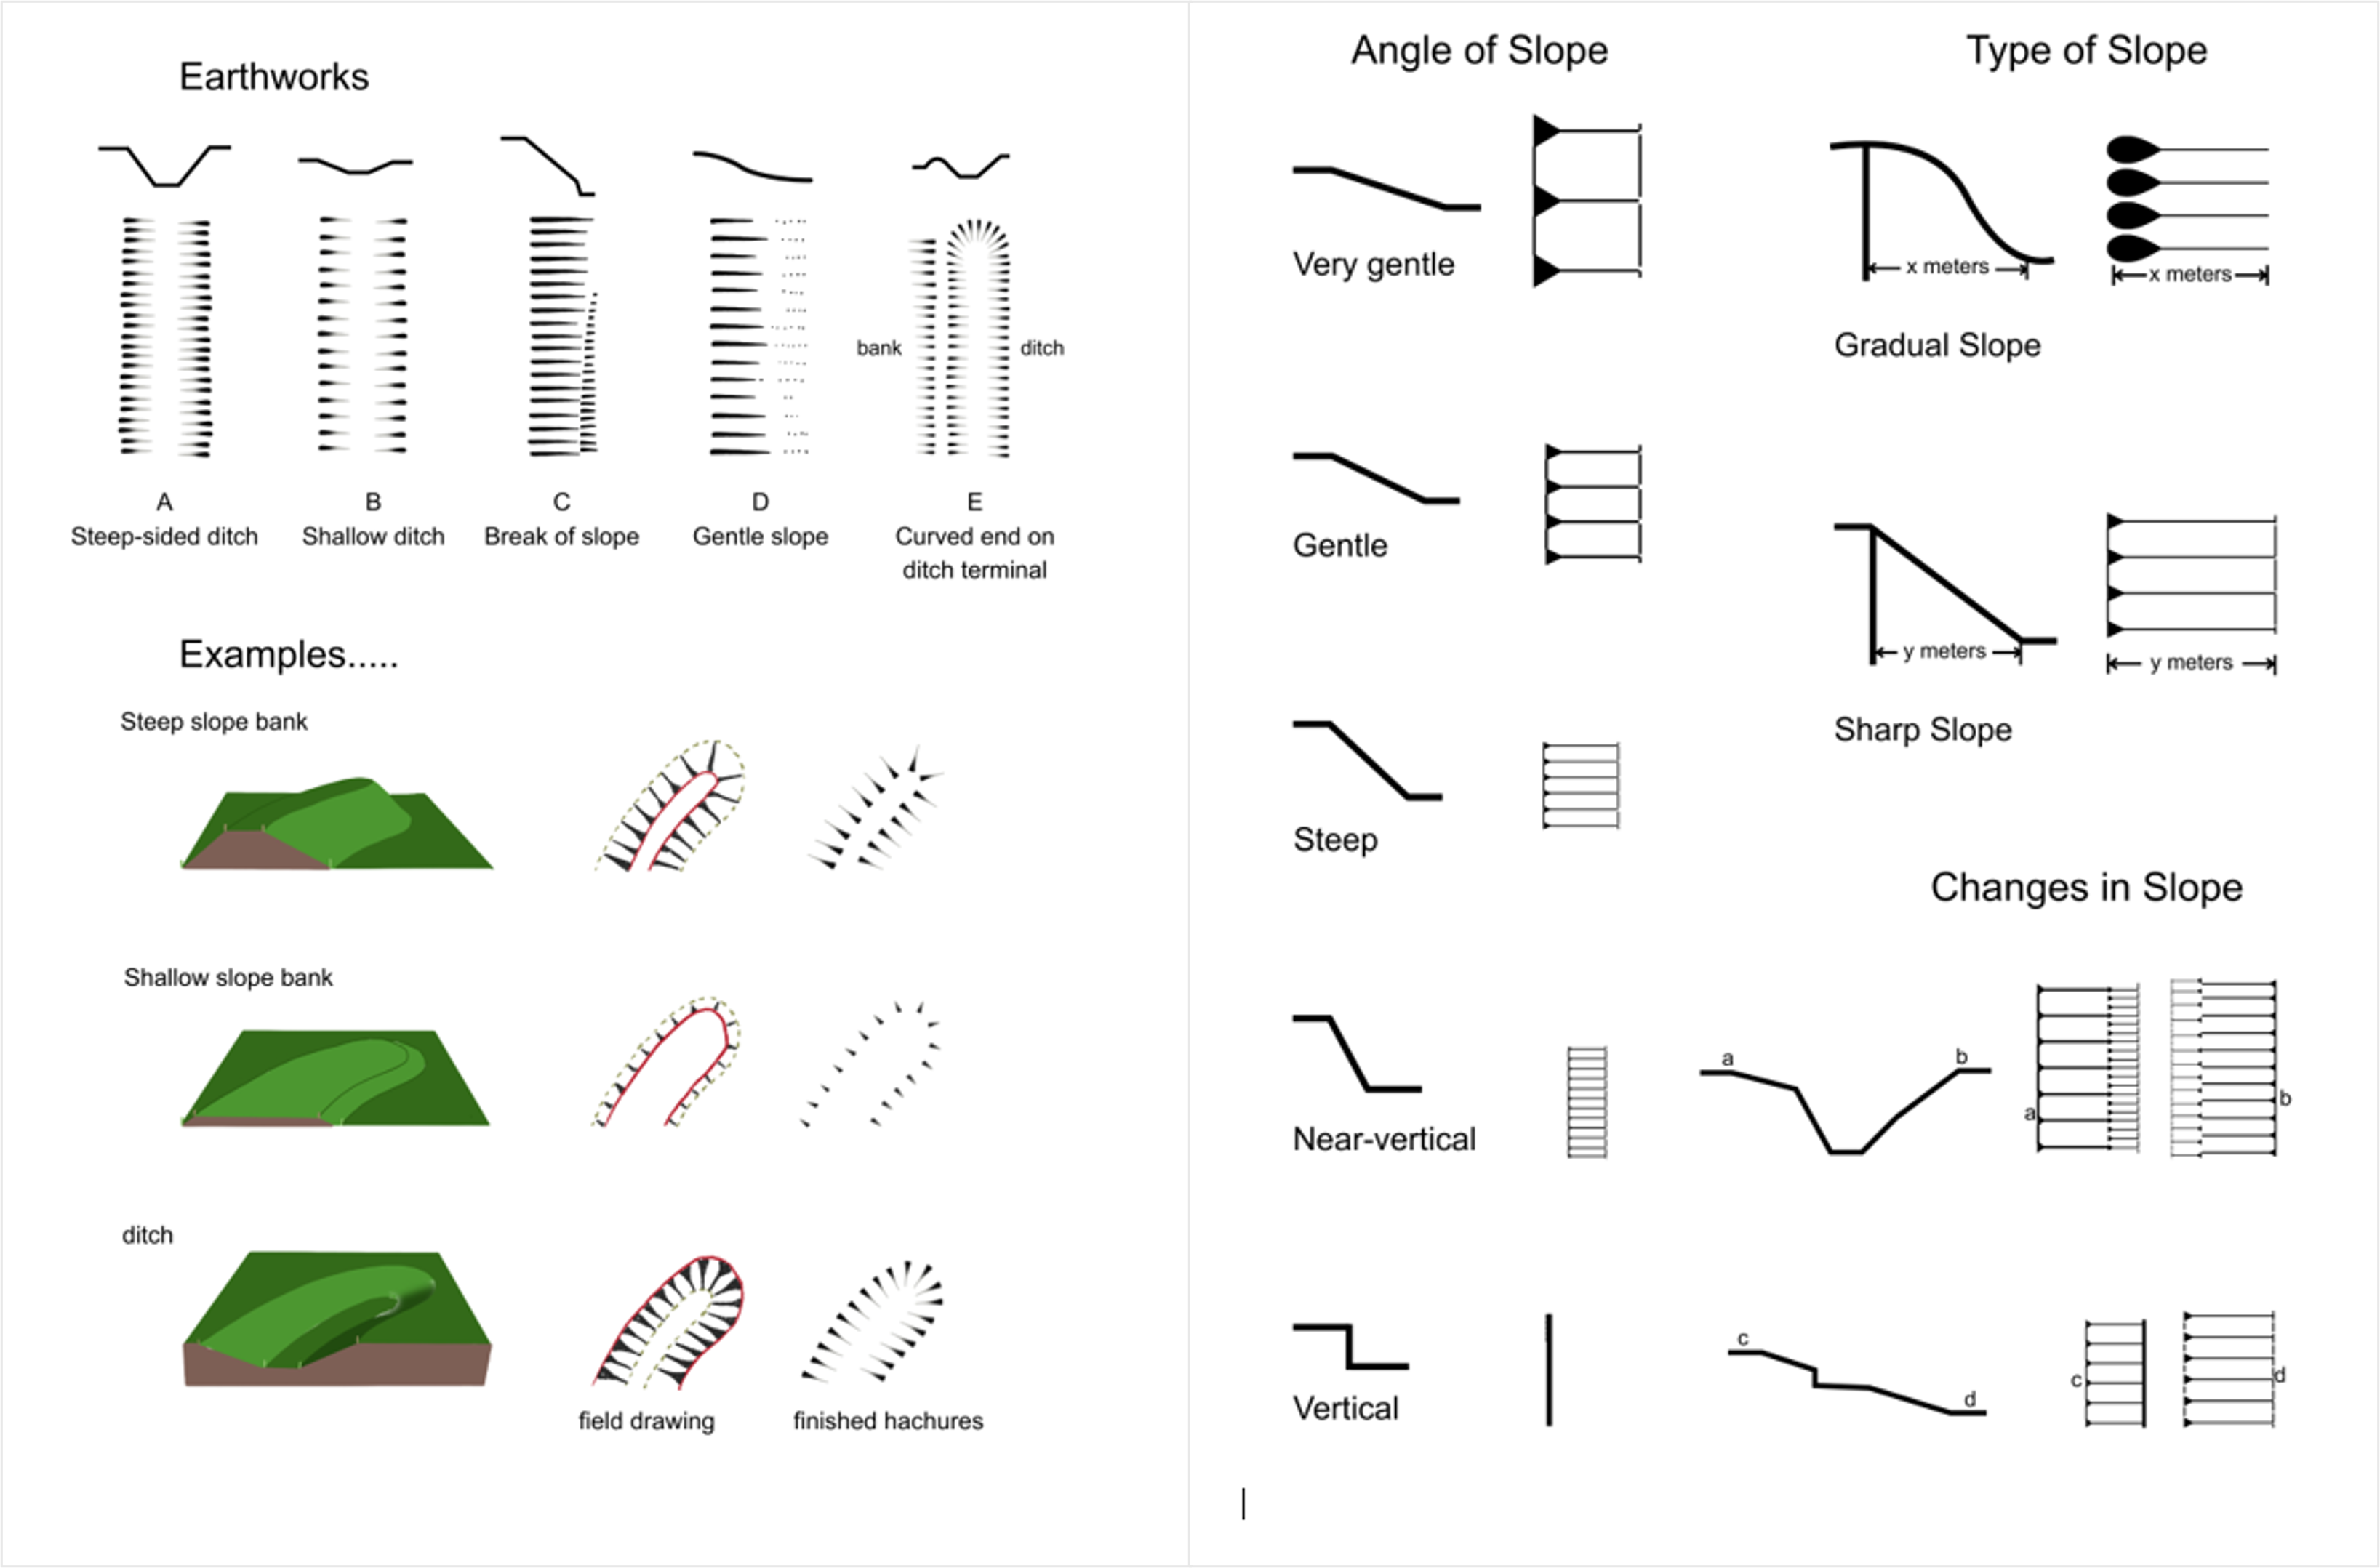
- Example hachure diagram (for reference) (bottom of the page)

Activity Steps
1. Orientation and Understanding (10 minutes)
- Identify a small survey area with varied slope
- Observe how the land rises, falls, and changes direction
- Review the core principles of hachure drawing:
- Lines run in the direction of slope
- Steeper slopes are shown with shorter, closer lines
- Gentler slopes use longer, more widely spaced lines
2. Setting Up the Survey Area (15 minutes)
- Define the boundaries of the survey area
- You can pace out the length (if you know your stride length) or use a tape measure (remember this does not need to be super accurate at this stage you are just building a picture of the area).
3. Conducting the Hachure Survey (30–40 minutes)
- Move systematically across the area
- Observe slope direction and steepness at regular intervals
- Measure distances and note changes in height where possible
- Draw hachures directly onto the map, adjusting line spacing and thickness to reflect changes in relief
Step 4: Recording Human‑Made Features and Using Different Hachures (15 minutes)
As you continue the survey, look beyond natural slopes and identify any human‑made features that influence the shape of the landscape. These may include banks, ditches, tracks, terraces, paths, building platforms, or boundary features.
- Before drawing, pause to assess whether a change in slope is natural or the result of human activity. Human‑made features are often indicated by sharper breaks of slope, straighter alignments, or sudden changes in height.
- Use different hachure styles to represent these features clearly. The hachure head should be a triangle to denote human-made activity. For banks or other positive earthworks, draw hachures pointing downhill from the crest. For ditches or negative features, draw hachures pointing inward toward the lowest point. Where features are particularly steep or appear strongly artificial, use shorter and more closely spaced hachures to emphasise their form.
Accurately distinguishing between natural and man‑made relief will improve the clarity and interpretative value of your completed survey, helping others understand how human activity has shaped the landscape.
5. Review and Reflection (10–15 minutes)
- Review the completed survey for consistency and clarity
- Reflect on:
- Areas that were difficult to interpret
- How effective hachures were at representing the landscape
- How accuracy depended on careful observation