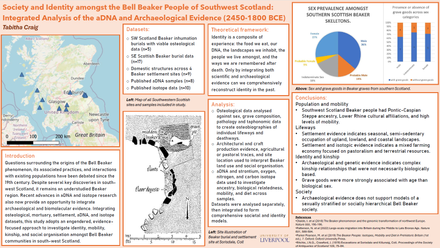
Grave Recording - How archaeologists record graves!

Hi! My name is Lara and I am a recent graduate of Queen’s University Belfast, where I spent my final year in placement with the Centre for Community Archaeology. During this placement, I have obtained a wide variety of skills, one of those being Grave Recording!
In this short blog, I will be sharing with you a step-by-step guide on how to record post-medieval graves – the likes of which you may come across in a graveyard or cemetery – in hopes of providing a clear and concise breakdown of the process taken by researchers looking into this area of funerary archaeology.
Step 1 – Initial Assessment and Permissions:
Before starting any research, it is essential to obtain the necessary permissions and comply with all relevant legal requirements. This may involve contacting local authorities or organisations. Additionally, it is vital to understand the site that you will be conducting your research within. This may include reading past excavation reports, historical papers, or other information about the site or cemetery in which you are conducting your research.
Step 2 – Survey, record, and grave’s location:
When surveying graves, archaeologists typically use a GPS device with survey-grade accuracy, typically within a range of +/- 10mm. This device will then be placed directly over or near the grave marker, and the GPS device logs the exact coordinates of the grave's location. These coordinates are then recorded on paper or in a digital notebook, and this process is repeated throughout the entire area being researched. This helps create a map of every grave you record during your research.
Step 3 – Describe the grave type and any other notable features:
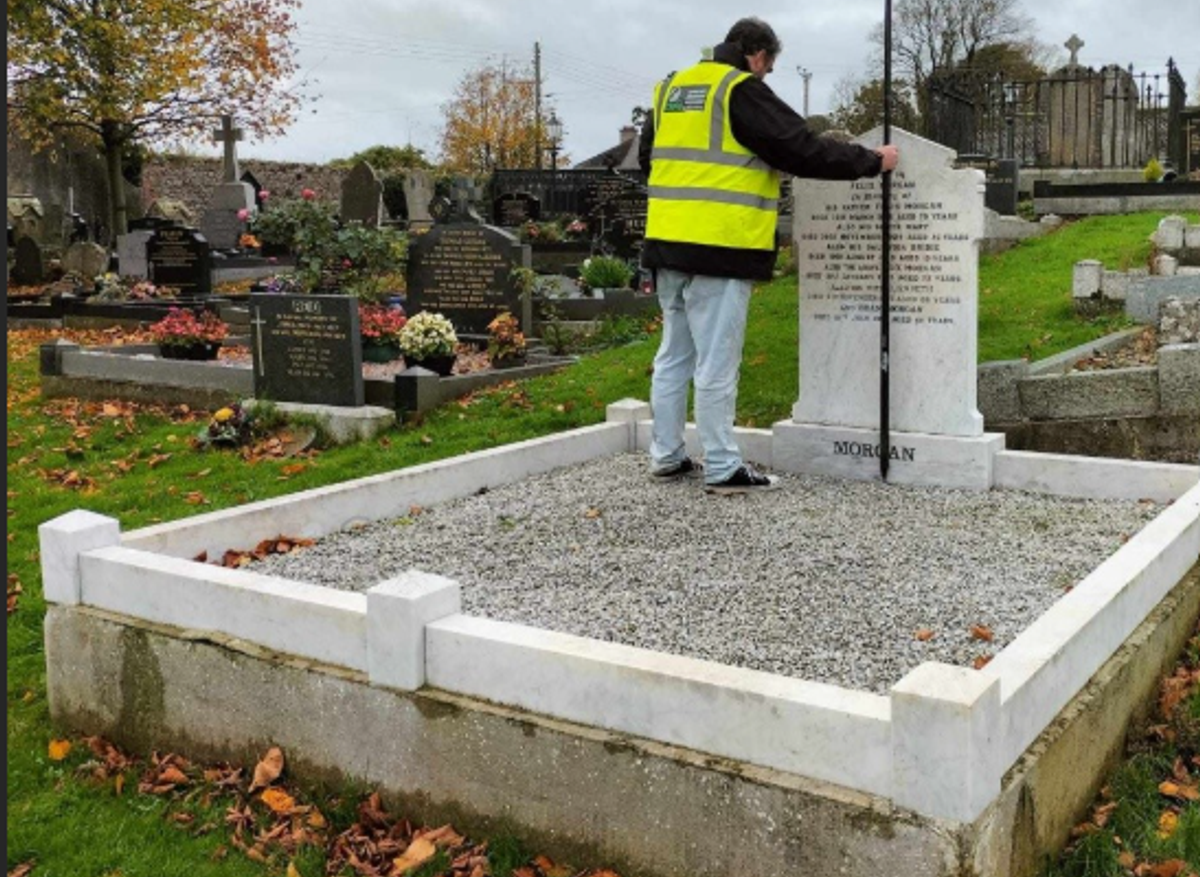
Once you have completed surveying, it is time to record the individual graves! When recording graves, you must obtain data relating to the following: memorial type, orientation, materials, condition, inscription, and any additional elements present on or within the grave.
Memorial type – can range from headstones (and if so, what shape!), ledgers, curbed burials, railings, and much more.
Orientation – this will depend primarily on the religion of the buried individual. In the case of most Christian graves, orientation is to the east. (Christians are orientated this way upon burial; not all headstones may be pointed this way, it also depends on the layout of the cemetery!).
Material – recording the material in which the grave-stone or funerary monument is made of can give away quite a lot about the buried individual or their families – for example, marble headstones are commonly used amongst wealthier families, with headstones made from slate and sandstone being more common amongst older graves.
Condition – A grave's condition largely depends on its age, with newer graves typically standing upright in excellent condition. In comparison, older graves are more likely to be fallen, sunken, or overgrown by nearby vegetation.
Inscription – this can reveal a lot about the person buried, most of the time giving you their names, ages, date of death, and in some cases, occupation. Inscriptions offer a unique opportunity to truly appreciate and understand the significance these individuals held for their loved ones. Some graves, however, are illegible, possibly due to the grave's age, and will thus not be able to be recorded.
Additional elements – This will involve the inclusion of anything that may be added to the burial; this may include, for Victorian graves and others of older date, motifs. Motifs often reflect the societal, cultural, and religious beliefs of the time or individual and have evolved significantly over time. Motifs are various patterns, symbols, or images engraved onto burials, often reflecting the societal, cultural, and religious beliefs of the time or the individual. Below is a link to an exciting website on cemetery symbolism, explaining the meaning behind many of the more common motifs one might find:
https://www.funeralguide.co.uk/cemetery-symbolism
Step 4 – Measure and record the dimensions:
The next step is to record the dimensions of the grave. For this, you will need to measure the grave's height, width, and depth using either a tape measure or a laser measuring tool.
Step 5 – Photographic Documentation:
It is essential to capture the grave and its context for future analysis visually. For this, you will need to take wide-angle photographs of the graves, the surrounding area, and any landmarks for context. Each photo is assigned a number, as is each GPS point, and this data is matched after the survey is completed.
Step 6 – Sketch!
This step will involve creating a visual representation of the grave’s layout and its contents. Make a detailed drawing of the grave and any notable features it may have.
Step 8 – Report Findings:
This step is essential, as it will ensure you have the opportunity to share your findings with a wider archaeological or historical community.
And there you have it, that is how archaeologists and other researchers would record graves!
Lara Wilgaus
Lara is a recent Archaeology and History graduate at Queen's University Belfast with interests focused on funerary archaeology, archaeology and history, and cultural heritage and museum studies.